The Freelander 1 is considered the baby of the Land Rover 4×4 fleet and some say it’s not a real Land Rover. So, if you are looking for an introduction to overlanding, would the cost effective Freelander 1 actually be a waste of money, or do its capabilities prove the skeptics wrong?
HOW CAPABLE IS THE FREELANDER 1 FOR OVERLANDING
They said a Freelander 1 could not tackle the Sahara—we did it!
Travelling Iceland in winter, going on “off-the-beaten-track” trails: the domain of Defenders. We did it in a Freelander!
Whether in blistering heat or freezing cold, the Freelander has proved itself an extremely capable vehicle. Whatever overlanding dream you have, don’t be afraid to embark on it with a Freelander.
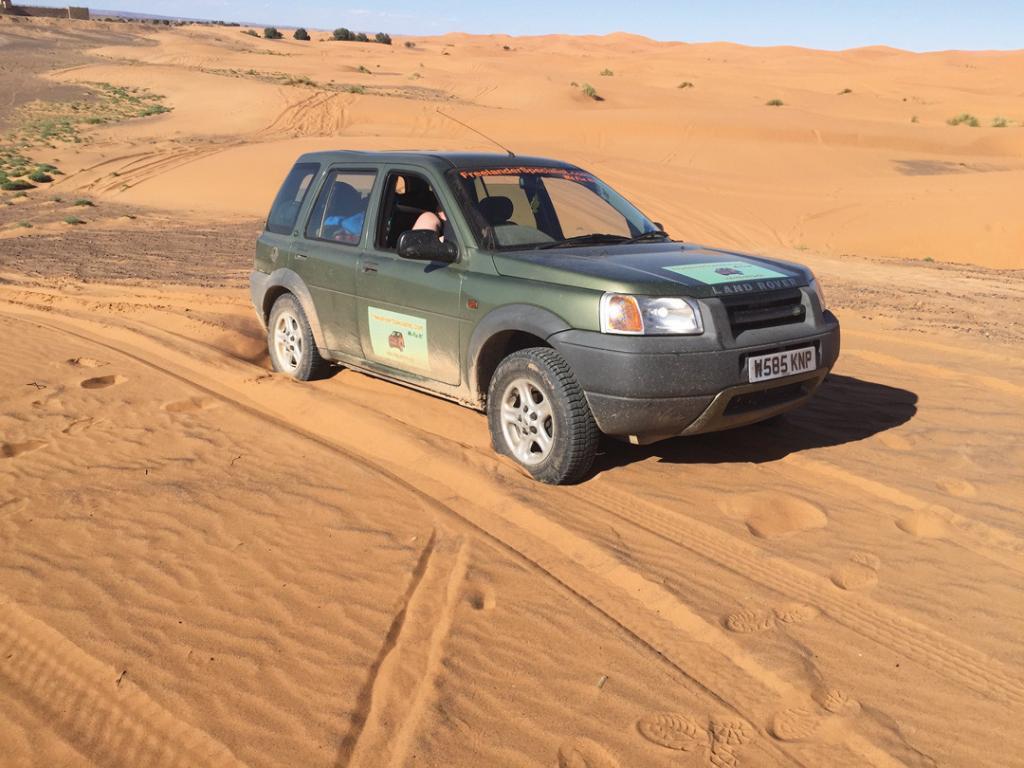
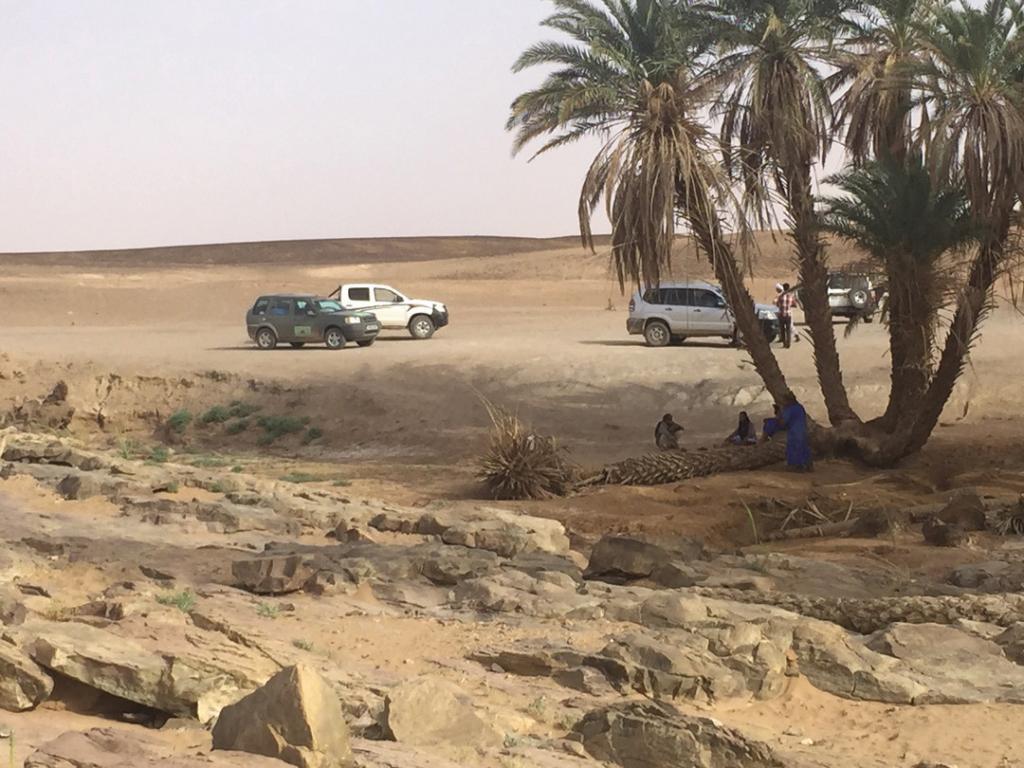
On a trip to Morocco we decided to tackle the Sahara with our newly acquired Freelander 1, Knapsack.
When we first hit the dunes on the edge of the Sahara, we were so excited we just headed straight up one. That was nearly the end of our clutch! But in fairness, that was not the Freelander’s fault, the Discovery we were with at the time had the same issue; that was pure ignorance—we hadn’t read the part of the book that said you cannot ride the dunes in the middle of the day: sand melts like butter, you just sink in!
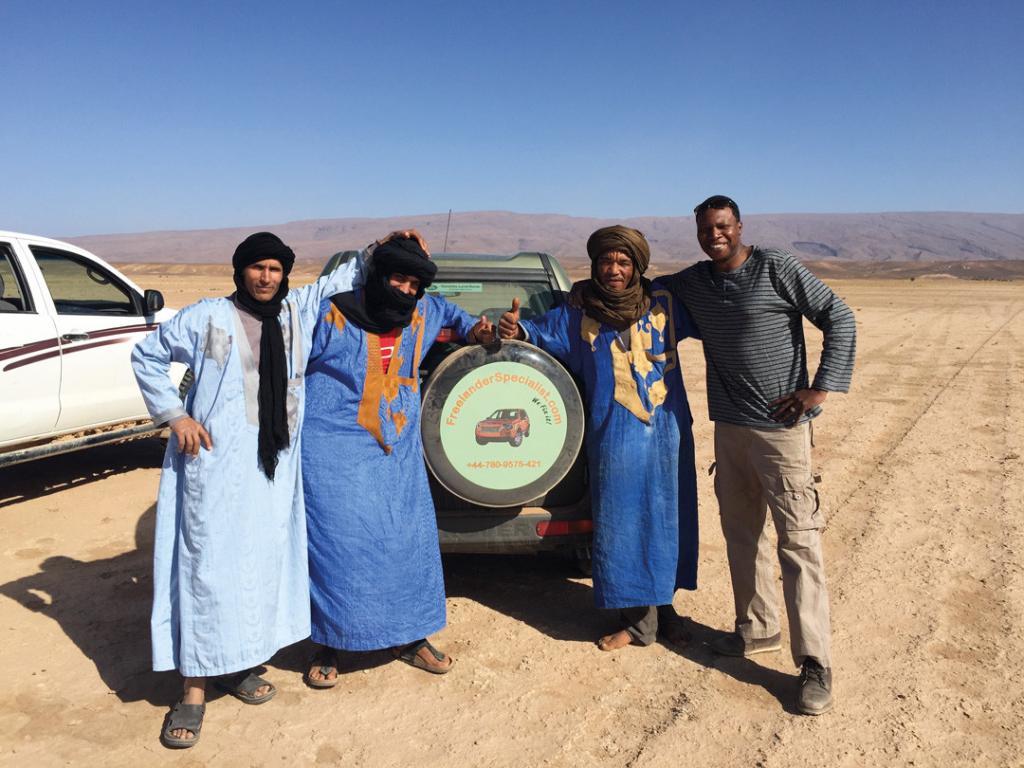
We had the guide books which specifically mentioned not to try crossing the Sahara in a Freelander. At the edge of the desert they told us not to try in a Freelander, it was too small a 4×4. We ignored them all! It wasn’t that we were reckless—we still had the sense to hire a support vehicle and guide—we were keen to experience just what the Freelander was really capable of.
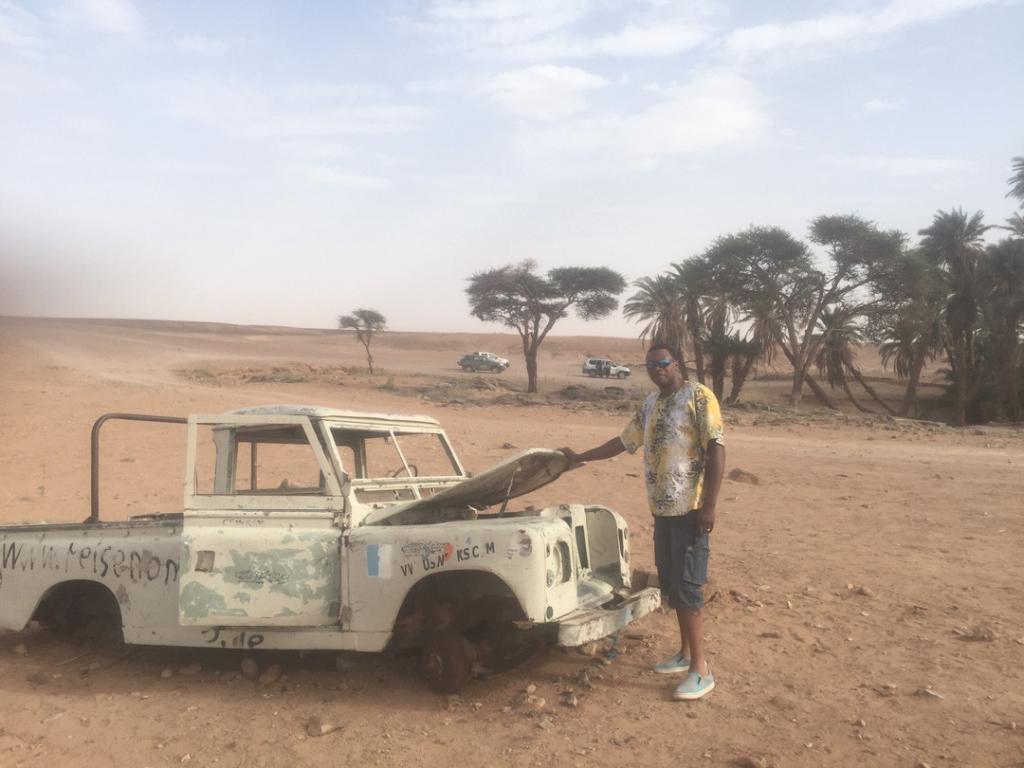
Driving the Sahara was challenging. We had to take a different approach compared to the big 4×4’s because we didn’t have the same ground clearance or power. However, with the help of added traction from using the hill descent control (HDC), even on the flat, and keeping our speed up to ride the sand, we achieved what—judging by the abandoned vehicles, including Defenders, which littered the sand—others clearly had not. When we emerged from the sand on the other side a few days later our support vehicle driver and guide were shaking our hands, saying “good car”, “good driver.”
You want to overland to the beach? The Freelander can cope.
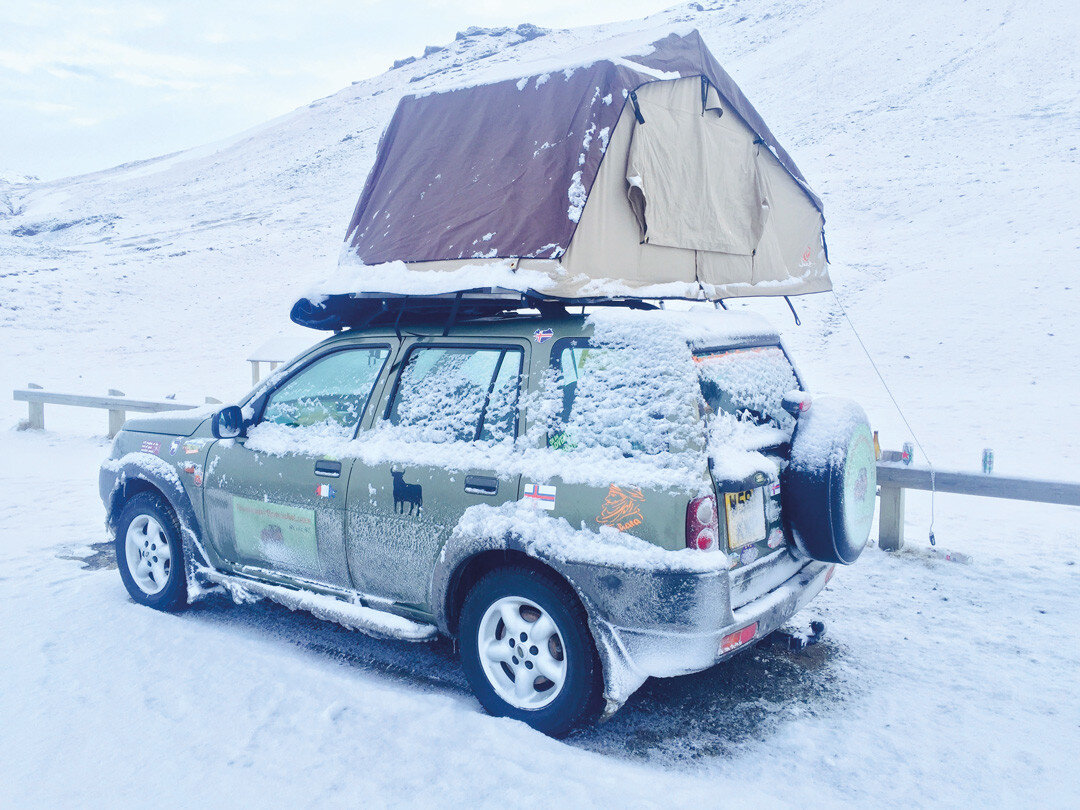
After the Sahara, we went to the other extreme: overlanding Knapsack around Iceland in winter whilst camping in our newly acquired roof tent. Yes, it was cold! If you put a drink on the ground for the five to ten minutes it took to set up the roof tent, it froze solid. We convoyed with a Defender on this trip and I have to say, the Freelander held the road better—the importance of having the correct tyres. There was only one very rough road, on the way back from watching the humpback whales feeding, where the ruts were a little too deep; that’s where we saw the advantage the Defender had over the Freelander—ground clearance. However, we had a massive advantage on the open road when the Defender windscreen wipers were freezing solid in mid motion—no problem with the Freelander and its heated windscreen—we were smiling!
You want to overland in the snow-covered mountains? The Freelander can cope.
Going to the extremes may not be your goal, but in doing so, we have repeatedly demonstrated that whatever overlanding adventure is calling you, a Freelander 1 will take you there and bring you back.
CAMEL TROPHY – ULTIMATE OVERLANDING. HOW DID THE FREELANDER 1 FARE?
The Camel Trophy was the ultimate Land Rover overlanding discipline, and in 1998 twenty Freelander 1’s were put to the challenge in Tierra del Fuego, the Land of the Fire. This was over 3,000 miles of adventure, between Santiago, Chile, and Ushuaia, Argentina—the southernmost city in the world—a greater distance than any other Camel Trophy event.
Each team had a supporting Defender 110, laden with adventure equipment including canoes, bikes, snowshoes, skis, and snowboards. If the organisers weren’t convinced of the Freelander’s capabilities before the event, they would soon learn how unstoppable they really are. When negotiating a mud track, the Portuguese team had no issues. Their supporting Defender, on the other hand, became stuck. The American team also had issues with their Defenders needing assistance—perhaps overlanding in a Freelander is not the first option to spring to mind, but the best option!
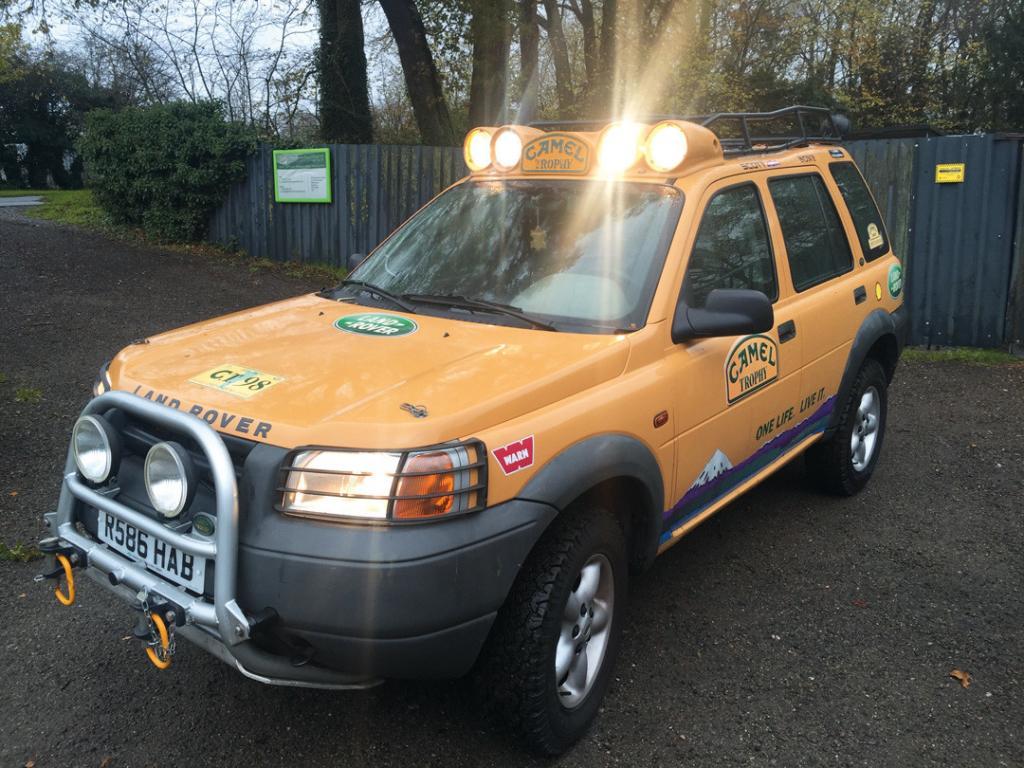
The Camel Trophy Club’s analysis of the 1998 event was, “The Freelander vindicated Land Rover’s conviction that it was a suitable vehicle for the event. It was fast and agile and sailed along the snow tracks, performing with a spirit that could not be imitated by the support Defender. In the mud the situation was more or less similar. Even so, the “porter” can argue in its defence that it was loaded with tonnes of equipment, that the small-booted Freelander could never have carried. Nevertheless, the American team still lost several bags (containing food, clothing and a large sum of currency) from the roof rack of the support vehicle.”
ARE ALL FREELANDER 1’s THE SAME?
The Freelander 1 was launched in 1997 and production ended in 2006. All Freelander 1’s are not built the same. In fact, there are four completely different engines to choose from, each of which were available in either the five-door station wagon or the three-door convertible model (even though, in practice, it really takes two people to remove the roof and then a big space to store it whilst you go for a drive).
Freelander DI, XDI, XEDI (1997-2006) The original diesel Freelander was badged as a DI, XDI or XEDI, and has the Rover L-Series 2.0-litre diesel engine—you will often hear this referred to as the L-Series Freelander. All L-Series Freelanders come with a manual gearbox.
Freelander 1.8i, Xi, XEi (1997-2006) The Freelander 1.8i (Xi or XEi) was the first petrol-engined Freelander, and, as the name suggests, it is a 1.8-litre engine, built by Rover (their K-Series engine). Generally you will hear this referred to as the 1.8 Freelander. All 1.8 Freelanders come with a manual gearbox.
In 2001, Land Rover introduced two new Freelanders:
Freelander TD4 (2001-2006) The TD4 Freelander has a 2.0-litre diesel engine produced by BMW, their M47 engine. Although not as prolific as the manual version, the TD4 Freelander is available with an automatic gearbox.
Freelander V6 (2001-2006) The V6 Freelander is another K-Series Rover engine, the 2.5-litre KV6. Unlike the rest of the Freelander 1 range, the V6 Freelander is only available with an automatic gearbox because it was predominantly developed for the American market, even though it was available across the rest of the world.
The 4×4 system on the Freelander (now we’re on to the important stuff for overlanding) is an active-on-demand system. This means you do not manually select the 4×4 mode. Instead, the Freelander will determine when you need to engage 4×4 (for example, if one of the wheels is slipping) and engage it for you, automatically. Although there are some slight differences in the make-up of the components for the different Freelander 1’s, the principle of the system is the same for all models; a front Intermediate Reduction Drive (IRD—equivalent to a transfer box); a central viscous coupling unit (VCU); and a rear differential (quite clearly at the rear).
One thing which is identical for all the Freelander 1’s is that they are now officially a classic car.
WHICH FREELANDER IS BEST FOR OVERLANDING?
The L-Series diesel Freelander, with its old-style diesel engine, and minimal sensors, is an absolute workhorse. If this was the only engine in the Freelander range, freelanderspecialist.com would be out of business! It was the choice for the Camel Trophy in 1998 (but it is worth remembering that the TD4 and the V6 had not been produced at this time)—and it has been our own choice for our overlanding adventures. The beauty of the L-Series Freelander is the robustness of the engine and the lack of sensors—less to go wrong when you are in the middle of the Sahara desert. Generally, even if you have issues—and we have had some major ones on our travels—the L-Series will still get you home.
Now we get to the 1.8 petrol Freelander. Unfortunately, we do believe this is the culprit which caused all Freelanders to have a bit of a bad reputation. But is it really the fault of the Freelander? The Rover 1.8 K-Series engine is a magnificent piece of engineering, used extensively in racing for its incredible lightness. It did, however, have an initial design fault; the cylinder head gasket was just too flimsy for the Freelander and the use of plastic dowels did not help. This has caused pretty much every 1.8 Freelander to blow the head gasket, usually by 70,000 miles (120,000 km). But a solution was soon found in the form of a modified multi-layer steel head gasket with steel dowels. Fitted properly, all the problems go away. The beauty of the 1.8 Freelander for overlanding lies in its simplicity; it is by far the easiest of the Freelander 1’s to work on (if unfortunate enough to be required) whilst in the middle of nowhere.
The TD4 diesel Freelander is probably the most popular of the range. This is a much more complex engine than the L-Series diesel, and hence, as with any modern vehicle, does tend to have a few more issues—many of which are caused by sensors! If you are overlanding in remote places for long periods of time this may cause you a problem, however, if you are travelling closer to home and humanity, then the TD4 Freelander is a great option. It is less agricultural than the L-Series Freelander which translates to a better driving experience.
The final Freelander is the V6 petrol Freelander. The powerful one. A beast of an engine which really does need a specialist and specialist tools to fix. This one will put a smile on your face as you drive down the road, but will it get you where you want to go? The V6 Freelander is extremely capable, but unless you are a competent mechanic with experience of these engines, it may not be the most sensible choice to take one into extremely harsh and remote conditions. If you want more local overlanding, with the power you need, when you need it, this is a great choice.
WHAT TO LOOK OUT FOR WHEN BUYING A FREELANDER 1?
If you are looking to buy any vehicle, you should be aware of the problems that tend to be common to it, and Land Rover Freelanders are no different. So here are some of the things you should look out for:
- If you are buying a 1.8 petrol Freelander be aware that the original head gaskets, at best, generally only last 70,000 miles (120,000 km), and often fail well before this. Check if the head gasket has been replaced. If it has, find out if it was replaced with a modified/uprated multi-layer steel (MLS) head gasket, and not another original single-layer gasket—as this will fail again after another 70,000 miles (120,000 km). If the head gasket has not been changed, then budget into the cost of your purchase the fact that you will need to have this done.
- The viscous coupling unit (VCU) on a Freelander is in the centre of the prop shaft and makes up part of the drive train delivering power to the rear wheels. This is a sealed unit containing a viscous fluid which has a life span of about 70,000 miles (120,000 km). If the viscous coupling unit (VCU) is not replaced regularly every 70,000 miles (120,000 km), you risk damage to the rest of the drive train—the IRD (transfer box), rear differential, and possibly even the gearbox. Check if the viscous coupling unit (VCU) has been replaced in a timely manner, if it has not, then you will need to budget for a new or reconditioned viscous coupling unit (VCU)—don’t be tempted to think it will be OK, the possible damage that can be caused by not replacing this unit can be very costly.
- Make sure the Freelander has a prop shaft fitted. Many Freelanders have had the prop shaft removed—generally because damage was already starting to happen to the drivetrain due to the viscous coupling unit (VCU) not being changed. The prop shaft runs underneath the vehicle, parallel to the exhaust; it is worth getting down on the floor and making sure it is there. If the prop shaft is missing and you are wanting the Freelander for overlanding, we would suggest you walk away!
- A Freelander is an active-on-demand four-wheel drive. At the front, connected to the gearbox is the IRD unit (transfer box), which connects to the prop shaft containing the viscous coupling unit (VCU) into the rear differential at the back. Check underneath the Freelander to see if there are any leaks coming from the IRD unit (transfer box) or the rear differential. When you test drive the Freelander listen for any clonking, whining or vibrations—these could indicate problems along the drive train. In particular, test the Freelander turning corners on full lock, both in forward drive and reverse—this is when any clonking or holding back will become most apparent. If the Freelander feels as though it is holding back, this is generally an indication of the viscous coupling unit (VCU) being past its useable life. If there is clonking from the front of the Freelander, this could indicate a problem with the IRD unit (transfer box). If there is a clonking or whining from the rear of the Freelander, this could be a sign of problems with the rear differential or the rear differential bushes.
- Check the tyres Are they all the same make, model, tread depth remaining and air pressure? Mismatched tyres can cause a lot of damage along the drivetrain of a Freelander. If there is any mismatch, get it sorted straight away—or walk away!
- The cam/timing belt The cam/timing belt on a Freelander (not the TD4, as this has a timing chain) should be replaced every 72,000 miles (120,000 km) or 6 years, whichever comes first. If the Freelander you are purchasing is over this mileage then check if the cam/timing belt has been replaced. This is not a cheap job on the 2.5-litre petrol V6 models, so make sure you budget for it, if it needs doing. Once again, don’t ignore its importance: a snapped cam/timing belt can completely destroy your engine.
- Check the coolant in the Freelander and the coolant reservoir. The coolant should be red or orange. If it is green or blue then it is probably wise to walk away, particularly if the Freelander is petrol—these coolants do not have the Organic Acid Technology (OAT) needed to protect the Freelander system from rusting. Also remove the coolant reservoir cap and check for hairline cracks around the neck—if any are present then budget on changing the coolant reservoir and cap.
- Warning lights There are three main warning lights on a Freelander that are often illuminated—much of the time all three of them are on together (affectionately—or is it frustratingly—referred to as the three amigos). These are the hill descent control light, the traction control light, and the ABS light. Very often these illuminate because of issues with sensors—the brake light switch; a wheel speed sensor, or a chaffed wire under the gearstick gaiter—but be aware, if it is not one of the common culprits, it can be difficult, and hence costly, to determine the source of the problem.
- Electrics When you purchase a Freelander it is always worth checking if the electrics operate correctly. If your Freelander has a sunroof, don’t be surprised if it doesn’t work—these often go wrong. If it does work then think yourself lucky and make sure you open and close it regularly so it does not seize up. If it doesn’t work the best thing is to make sure it is properly sealed, take the fuse out so you don’t accidentally try to open it and end up with a half-open sunroof that you can’t get closed again, then forget you ever had one. Check if all the electric windows and central locking works, remembering that the rear tailgate window is also electric. All vehicles have issues inherent to their model, the key is to be aware of them and make sure when you are buying your Freelander you know what repair or servicing work may need doing to it soon after purchase, so you can factor it in when deciding if the price is right.
EQUIPPING YOUR FREELANDER 1 FOR OVERLANDING
So, you are going overlanding and, of course, you want to look like an overlander. How you equip your Freelander for overlanding really depends on how deep your pockets are. The real beauty of the Freelander is you do not have to equip it with anything.
On our maiden journey, across the Sahara, where all the books and people told us a Freelander could not go, our Freelander was absolutely standard. No fancy lift kit; no uprated clutch; a standard tent and some plastic boxes with our supplies in. Did we make it where no man said we could? We most certainly did, and don’t forget, they shook our hands when we came out the other side, saying “good car.”
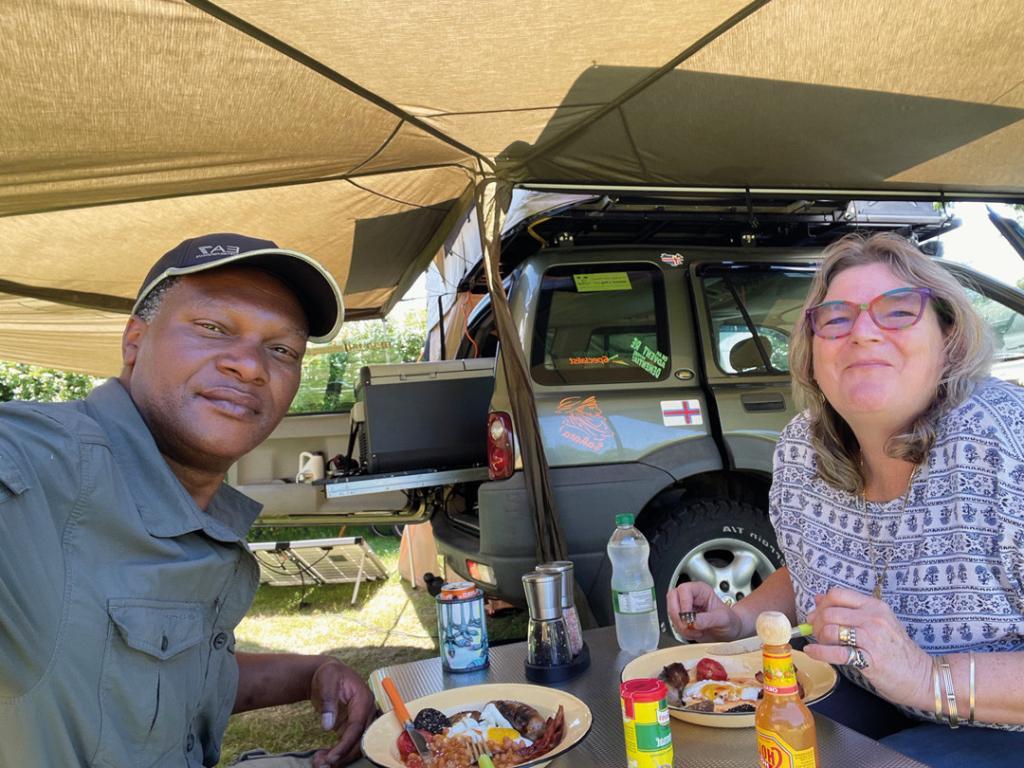
Nowadays we have a roof tent (fitted in time to go to Iceland in winter); we have a 270-degree awning with all the extensions; we have water on the roof tapped down to the rear of the car; storage drawers in the back (we removed the rear seats for these—love them!); a fridge freezer; solar panel—we even put electric bikes on a bike rack attached to the tow ball.
Yes, we are very loaded for a Freelander, but he still performs. The roof capacity is 75 kg and he handles a roof rack with roof tent, water container and storage box with no issues.
In terms of modifications, we now have a 40 mm lift kit fitted. If you choose to install a 50 mm lift kit, be aware you will need to always have genuine Land Rover driveshafts, which can be horrendously expensive; an uprated clutch (definitely a good move after nearly burning the clutch out on the sand dunes); uprated clutch hydraulics, which can be bled; and, well, very little else actually. The original design of the Freelander is good enough.
What are the best things we have done? The best thing we have is something I have not even mentioned yet, and that is our chairs. A comfortable chair is a must, don’t skimp on the chair! Get yourself some good chairs, then add the rest as you go.
PREPARING YOUR FREELANDER 1 FOR OVERLANDING
If you are about to set off on an overland trip with your Freelander, there are a few things worth doing before you depart.
The obvious thing is to get it serviced, however do a bit of forward thinking and service it 10 days to two weeks before you go, rather than immediately before setting off.
If you have a 1.8 Freelander, it is worth getting the adaption kit to reposition the thermostat to the front of the engine, if it is not already fitted there—just make sure you blank the thermostat at the rear of the engine.
The low pressure fuel pump on the TD4 Freelander has a shorter life span than would be ideal, so it could be worth carrying a spare. However, the major issue with the TD4 is failure to replace the crankcase breather filter when the Freelander is serviced. We generally only see this problem when the Freelander has been serviced by a generalist garage, as some do not realise this filter exists (it is tucked away at the rear of the engine) and fail to change it. There is an oil separator available from BMW which can replace the crankcase breather filter and hence eliminates this issue—definitely worth fitting.
As the name implies the V6 Freelander has a six-cylinder V engine. The main issue with these engines is that the thermostat is in the centre of the V—where all the heat is—and is encased in a plastic housing. This means it can be prone to leaking. In itself, changing a thermostat is not such a big deal, however, if you do not notice the loss of coolant this can result in head gasket failure, which on this engine is a big job. So check your coolant level regularly, or there is a metal thermostat upgrade available which will eliminate the issue—worth fitting if you are going to do serious overlanding with the V6 Freelander.
Have you noticed the lack of comments on the L-Series Freelander? Just get in it and drive! Although, having said that, both the 1.8 and the L-Series do benefit from the Sheddist clutch hydraulics—these are bleedable, unlike the originals.
One of the most important things when you are overlanding with your Freelander is your tyres—at the end of the day, these are what will keep you on, or off, the road. Make sure you select tyres to suit the terrain you expect to encounter. If the terrain is not severe, then fit good all-terrain tyres.
Make sure you take spare fluids (and I don’t mean beer and whisky—although we have been known to put gin and tonic in a cooling system before in the African bush when we ran out of water), particularly coolant and oil.
When it comes to packing tools, again consider the type of overlanding you are doing. If you are going on rough terrain then your issues are more likely to come from the suspension, so make sure you have the tooling to deal with it—we had a driveshaft issue in Iceland and managed to transport a replacement driveshaft from the UK only to realise we did not have the tooling to replace it. We had to limp around a number of garages before we found one prepared to lend the tools to us.
In amongst the excitement of going on your adventure, don’t forget to take any special equipment you might need for the climate, such as snow chains. However, probably more important, make sure you know how to use them before you go! Having been pushed off the road into an invisible ditch (don’t ask!) by a snow plough in the Artic Circle, even the snow plough could not get enough traction to pull us out. We needed the help of our snow chains, but yes, you guessed it, we had not practiced at home and in the heat of the moment (heat? No, it was extremely cold) figuring out the instructions was impossible. Fortunately a knight in shining armour (or was it a snow suit?) came along and fitted them for us.
SO, SHOULD YOU RUN OUT AND BUY A FREELANDER 1 FOR OVERLANDING?
Yes. Yes, yes, yes, yes, yes! These are superb vehicles, but make sure you understand them—you will fall in love! They are exceedingly capable and we have personally shown they will go practically anywhere the big boys will go.
So what are you waiting for?
FREELANDERSPECIALIST.COM
Text & images: Sue Maddock
